How To Use a Digital Multimeter to Test Voltage
Do you want to be an electrician but don’t know which tools you will need? We can tell you for free that a multimeter is one handy tool you will need, among others. A multimeter is to an electrician what a stethoscope is to a doctor, which is why you need to know how to use one.
How to Test Voltage Using Digital Multimeter
What is a Digital Multimeter?
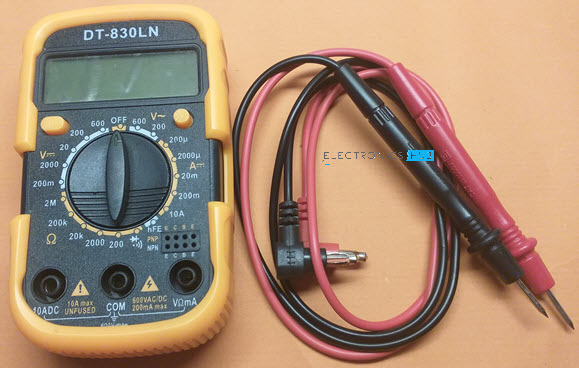
A digital multimeter is a tool or device you use to test for current, voltage, resistance, capacitance, among others. Most multimeters have multiple functions meaning they can test different parameters.
Using a multimeter is relatively straightforward. Apart from the best affordable multimeter being easy to use, it also comes with a manual to guide you and ensure you don’t miss a single step.
Step 1
Plug in the respective probes into their respective ports—Black for Com port and red for VΩmA port.
Step 2
Turn on your multimeter and set its dial to Voltage mode. You will know it by the straight line or equals (=) sign.
Step 2
Set the range you want to test for. It should be above the test but not too high for you to get the correct result.
Step 3
Put the red probe on the positive (+) terminal and the black one on the negative (-) terminal. That way, you will have successfully used a multimeter to test for voltage.
How to Use a Multimeter on a Car
There are various tests you can do on your car with a multimeter. You can test for the wiring to see if there is a break anywhere in the circuit or test the battery to see whether it’s in good working condition
How to Use A Digital Multimeter to Check A Car Battery
Among the many uses of the multimeter are tasting car batteries. By using a multimeter, you will be able to know the power currently in the battery. So how do you test for it?
Step 1
Switch on the headlights for a few minutes to eliminate any battery charge, then set the multimeter to a value between 15 and 20 volts.
Step 2
Now switch off the lights and connect the multimeter’s probes to the negative (-) and positive (+) terminals. The red probe should be on the positive and the black on the negative terminal.
A result far from 12.6 volts will mean your battery is defective. It should be at or around that value for it to be working effectively.
Step 3
Start the vehicle and repeat the test on the battery. If it is below 5 volts, then you have full confirmation the battery is defective. You will have no other option but to get another one.
Testing A Car’s Wiring
Testing your car’s wiring for any breaks in the circuit is simply testing for the wiring connection’s continuity. It will help you know where the problem might lie with your car.
Step 1
Ensure the car isn’t running and that any current isn’t running through the wires. Again, Plug in the respective probes into their respective ports—Black for Com port and red for VΩmA port.
Step 2
Switch on the multimeter and check for the dial with a sound wave icon. Set it to continuity mode.
Step 3
To test for continuity of the car wiring system. Touch the probes on opposite ends of the circuit you are testing and observe the display. There is no continuity if you see an OL o 1 on the loop, meaning there could be a break somewhere. If there is continuity, you will see the display shows zero.
Bottom Line
And that is how you can use a multimeter to diagnose automotive issues. As you can see, it wasn’t a complicated affair, and anyone can do it, so don’t be shy to try it out whenever your car acts up.


