When people think of fabrication, often they imagine 3-axis machines, lathing, or another subtractive machining process. However, 3D scanning and printing are now added to the process workflow for fabrication in dozens of industries.
The result is that we are soon approaching real-life replicators from Star Trek: The Next Generation. You may even be using technology like this sooner than you think. Especially if you’re a maker or crafter.
What are 3D scanning and printing? What is the process like? Keep reading to find out more about this exciting technology
What Are 3D Scanning and Printing?
It’s possible to perform 3D scanning and printing on almost anything. From objects, environment, to even living things, 3D scanning and 3D printing technologies are booming.
A 3D scan works by making a mesh of the thing you’re scanning. The mesh is a 3-dimensional plot or map. A 3D scanner records these points on the x- and y-axis, as well as the z-axis.
It receives this information through five means of gathering data:
- Laser triangulation
- Laser pulse
- Photogrammetry
- Structured light scanning
- A physical probe
Industries that use these kinds of technologies are industrial design, reverse engineering or modification teams, healthcare, design prototyping, the movie industry, education, and more.
The various techniques and technologies of 3D scanning have even been miniaturized it a great degree. You can now even 3D scan with a phone using an imaging app — kind of. Of course, specialized hardware and software will perform better in almost every case.
The caveat is that not all scanning methods are created equal. Laser scanning is almost always the most accurate method of 3D scanning available. They aren’t always possible to use though.
Enter: technologies like photogrammetry and physical probing.
Where the precision of lasers isn’t necessary or the cost is too high, photogrammetry can stand in as a good substitute. Physical probing is the lowest-quality technology for scanning. However, if the object is in motion, there may not be another alternative.
The Basic Steps of 3D Scanning
The steps of 3D scanning come long before you print anything. It also comes long before choosing the materials to create the object you’ll be printing later.
If you’re reverse engineering an object, your workflow likely looks like this:
- Prepare the object by spraying it with matte powder
- Use your 3D scanning technology of choice to scan the object
- Refine the resulting 3D mesh
- Import the mesh into CAD software
- Extract and define important surfaces
- Edit the features of the design as desired
- Use a 3D printer to create your new design
Matte powder coating is a temporary treatment that prevents reflections.
Matte powder is almost always necessary on plastics or anything with a sheen. If you’re trying to scan something transparent, you’ll need a matte coating. You may want to even use one with a pigment.
Even so, you’ll have to reorient your object several times during scanning to get a complete “image.” This also depends on the technology you’re using. The devices will, in essence, stitch together your object like a panorama photo taken on a phone.
Refining the mesh is almost always necessary. Whether you want to do this automatically, semi-automatically, or manually is up to you. The mesh creates a massive file, and you’ll need to refine it to get a working file that’s small enough to work with.
Once that’s done you can import it into the CAD software of your choice. From there, make your changes and prepare the file for the printer.
If you need more in-depth details make sure to check out “What Is 3D Scanning & How Does A 3D Scanner Work? Your Ultimate Guide”.
Printing in 3D
The potential of 3D scanning is a real boon to any and every industry today. But only scanning an object doesn’t give you the ability to reproduce it or modify it. To do that, you need a 3D printer.
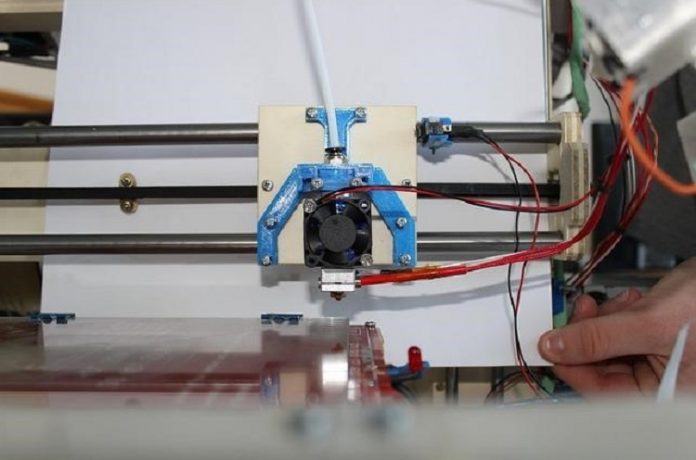
A typical 3D printer is a printer that prints in all three dimensions. When you print on a piece of paper on a traditional printer, you are working in x and y planes or axes. A 3D printer also prints in the Z-axis or plane.
Instead of inks, the 3D printer usually uses thermoplastics, which are plastics that melt when you apply enough heat. Common thermoplastics are ABS, PLS, or PETG plastics.
Resins are not usually used in 3D printing, although there are projects that combine lasers and resin.
Printing in 3D is what is called an “additive” process. This means you are adding material to the workpiece. In a “subtractive” process, you are removing material from the workpiece.
This technology has now moved on to printing organs and living cells. Of course, it works differently than printing with plastic. There are also machines that print using metals — even exotic ones.
All of this requires a print file. These are instructions that the printer receives.
These instructions are in files called STL files or Standard Triangle Language —the industry standard of 3D printers. You get these files exported from CAD programs you use to create or modify your object on the computer. It exports the file into a machine language called G-code through dozens or even hundreds of “slices” of the object.
3D printers build an object layer by layer using these slices as guides.
3D Scanning and Printing: Your Quick Guide
This is only a quick guide to 3D scanning and printing and there’s a lot to learn about if you want to give it a try. If you’re a crafter or maker, or even want to add more versatility to your machining shop, 3D scanning and 3D printing are worth a look.
Tech Update is your go-to source for new and emerging technologies in business and social media. Don’t get left behind in today’s crazy and quick-paced world. Keep up to date with the latest in technology today.

